
This week’s blog comes from our Instructional Designers, as the team shares their five top tips for using Captivate to create eLearning courses and simulations.
IN THIS ARTICLE...
1. Get a High-Resolution Monitor to Create eLearning
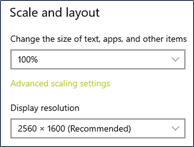
Between the Adobe Captivate panels (Properties, Library, Timing, Quiz, etc.), Timeline, and Filmstrip, the workspace quickly becomes crowded, even with Captivate fully expanded.
To prevent having to close essential panels and scrolling up and down and back and forth, when using Captivate to create eLearning, invest in a high-res monitor with a minimum 2560×1600 resolution and the scale set to 100%.
I use a laptop with these specifications and have found that an external monitor is not required.
Pro Tip: The built-in software simulation function for eLearing with Captivate (that we discuss below) only works well with a scale of 100%.
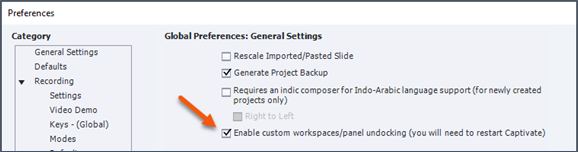
2. Create Custom Captivate Workspaces
If you find yourself constantly adding, closing, resizing panels, the timeline, the filmstrip, master slides, etc. create custom workspaces.
In Captivate, select the Enable custom workspaces/panel undocking check box found by clicking Edit>Preferences>General Settings (you will need to restart Captivate). After restarting Captivate, set up as many workspaces as you need to accomplish different tasks.
For instance, I have two workspaces: one for general work and one for organizing slides and adding audio. Once the application environment is set to your preference, save it as a workspace.
Pro Tip: Each time Captivate is re-opened, you will need to “reset” your workspace. If you have problems with using Captivate to create eLearning and are instructed by Captivate support to “reset to defaults,” all workspaces are removed, and the setting will require re-enabling and workspaces rebuilt.
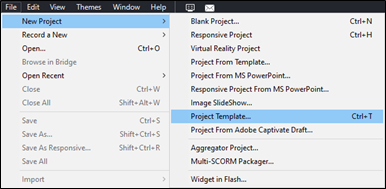
3. Use Adobe Captivate Templates
Many repetitive tasks are required when creating content. Identify those tasks and create a template with configurations for those tasks.
This is a big time-saver, especially when creating firm-branded content. To create a template, click File>New Project>Project Template.
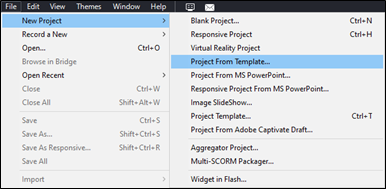
To use a template, do not open it from File Explorer; doing so opens a “template” file, not a “project” file. The proper way to use an Adobe Captivate template is File>New Project>Project From Template.
Features to configure in a Captivate template:
Adobe Captivate Themes: A Captivate theme can be used with or without a Captivate template. We configure them as part of our templates if we are using Captivate to create eLearning since all our work involves Intellek branding and our internal best practices.
Captivate features included in a theme:
- Master Slides: Add company branding elements like logos to the appropriate master slides.
- Color Palette: Configure the firm’s color branding.
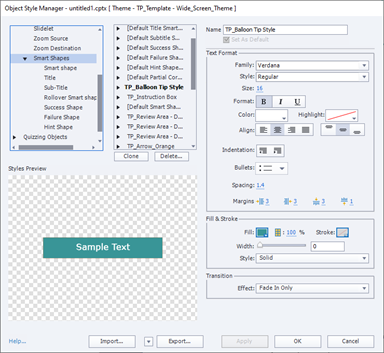
- Object Style Manager: Set all options for how Smart Shapes, Captions, and other objects, should be configured. While this is a labor-intensive task, doing it upfront as part of a Captivate template / theme means not worrying about it afterward.
Pro Tip: Creating styles for each Captivate object also means if a style must be changed, change it in the Object Style Manager to apply it to all objects with that style. It also means that if you want to change the timing of an object, you can specify the style, not the object. See the Apply asset timings tip below. Think Microsoft Word Styles on steroids!
- Table of Contents: Configure TOC settings, including font, font size, font color, TOC position, and the contents of the TOC.
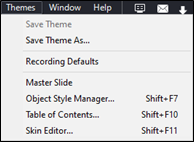
- Skin Editor: Enable built-in playbar buttons like Play, Mute, Fast Forward, Close, etc. Define the playbar and player borders.
Pro Tip: Use the Themes button on the ribbon when using Captivate to create eLearning, to apply a theme to a project or view Theme Properties.
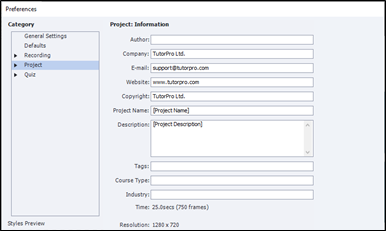
- Preferences / Project Info: Set all “generic” project information, like Company information.
- Add all frequently used assets to hidden slides: At the end of the template, add assets/objects slides and configure each with its preferred timing, size, and color. Then “Hide” the slides. Once you are ready to add them, go to the appropriate hidden asset slide, and copy/paste each on the relevant slides. Items Intellek adds to asset slides include highlights, arrows, click boxes, text entry boxes, etc.
Pro Tip: If you’re creating eLearning and want to find out more about Captivate Themes and Templates, take a look at this Adobe resource: Exploring Themes and Templates.
4. Be Efficient & Methodical using Captivate to Create e-learning
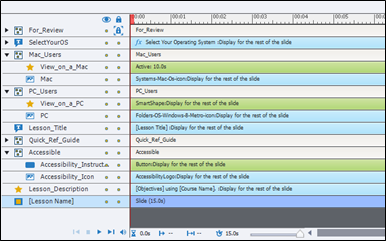
- Efficiency! Name all objects in the Timeline and Properties panel: If there are many objects on a slide, the timeline can get cluttered and confusing if the default Captivate naming conventions are used. If you work with teammates or get “hit by a bus,” your teammates may need to decipher your thinking on assets. Documenting each asset with its purpose makes it easy for someone to follow along behind you.
- Be methodical: There are MANY moving parts in a Captivate course. Being methodical when using Captivate to create eLearning ensures a configuration is not missed. Let your workflow as follows:
- Capture all slides. You can never have too many captured slides, but you can have too few. When capturing (whether from Captivate or using a screen-snipping application), it is easy to inadvertently hover over a command, displaying a Screentip that may show in your capture. As you capture informational slides, be sure that the application window is active and the mouse has moved offscreen before pressing PrintScreen. If trying to capture a static insertion point, multiple PrintScreen pressings will be required.
- Once captured, look at each slide. Eliminate those not needed; re-capture as necessary.
- Add each asset / object type (type by type) to each slide requiring them:
- Instruction boxes – copy/paste the instruction box from the asset slide, select all other slides, and paste!
- Highlights
- Click boxes, etc.
- Add the content to each instruction box on every slide.
- Format instruction box contents appropriately.
- Add audio.
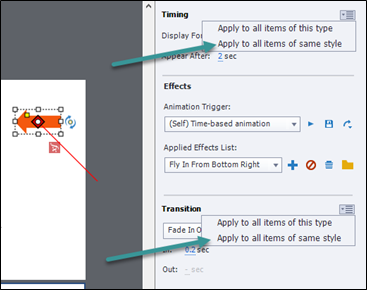
- Applying asset timings: Once you are 99% sure all assets / objects are applied and you are close to finishing your project, use the hidden asset slide(s) objects to apply the timings you configured earlier.
Pro Tip: Be very careful not to use the Apply to all items of this type option. Doing so will set all item types (in the above illustration, all Smart Shapes) to the selected setting, not just the style defined in the Object Style Manager.
4. Select Captivate Software Simulation Option
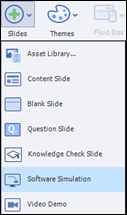
Of all Adobe Captivate features, Software Simulation is probably our favorite when using Captivate to create eLearning.
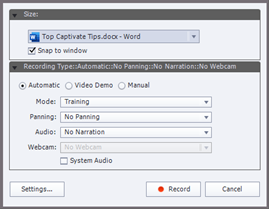
Configured correctly (in your template), and used correctly, makes it simple to capture application windows at the proper dimensions for your slides. Also, interactions can be automatically included as you “click through” the simulation.
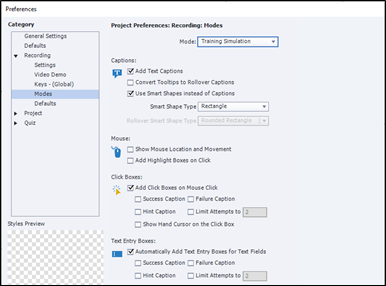
Captivate Software Simulation is a fantastic and time-saving feature that works flawlessly! Be sure to configure the Training mode and use it when capturing.
How to use Captivate to Create e-learning
We hope you find these tips from our Instructional Designers on using Captivate to create eLearning helpful. If you have any questions, please feel free to reach out at any time.

Intellek (formerly TutorPro) is a founding member of the learning technology industry. With a presence in the USA, UK, Canada, and the EU – for over 30 years we have pioneered the development of cutting-edge eLearning software and online training solutions, with a large and diverse portfolio of international clientele.
Disclaimer: We use all the tools available including generative AI to create relevant and engaging content.